Do you ever plan to make something really elaborate to bring to a party only to realize you have 5 minutes left to pull something together? Please tell me it's not just me!
This weekend I was busy working hard and momming harder until nearly the time we had to leave. That's ok! This is where creativity shows up at just the right time. I saw my banana hammock and knew I wanted to make something that looked and tasted fancier than it really was. ;-) Enter… Banana Sushi!
P.S. It truly took only 5 minutes to make. Then I dropped it everywhere. Batch #2 took another 5 minutes. So if you're clumsy like me, allot 5 minutes (batch 1) + 5 minutes (batch 2) + 3 minutes (clean-up) = 13 minutes…still totally doable, right?!
Side note: This "chocolate" works for just about any chocolate-y recipe you want. Feel free to add peanut butter too if you're feeling extra indulgent. Just please, please, please - for the love of nut butter - make sure your peanut butter has nothing but peanuts listed in the ingredients. Sugar, hydrogenated oils, and high fructose corn syrup have NO business being in YOUR peanut butter.
Enjoy!
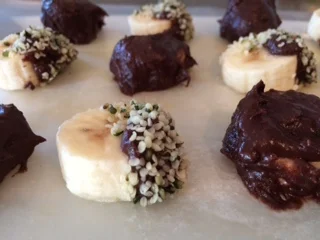
Banana Sushi
Ingredients:
Bananas
Cacao powder
Coconut oil
Honey
Hemp seeds
*Note: no measurements are listed because I just played around with the ingredients until I got the consistency and taste I wanted. For me, I didn't want it to be too sweet, so I didn't use too much honey.
Directions:
1. Cut banana in 1/4 inch slices.
2. In one bowl, mix coconut oil, cacao powder, and honey in a bowl.
3. Pour hemp seeds in a seperate bowl.
4. Dip bananas in chocolate mix until coated and then spoon hemp seeds on half of them.
5. Place coated bananas on wax paper.
6. Freeze for at least an hour before devouring. ;-)