gluten free dessert

Just a cold, sweet treat today...

Keepin' it simple today...


...with a delicious recipe. If you want to catch up with the workouts and health and fat loss tips of the week, come visit me on instagram. Be sure to check stories ... I post there everyday!

IMG_1866.jpg


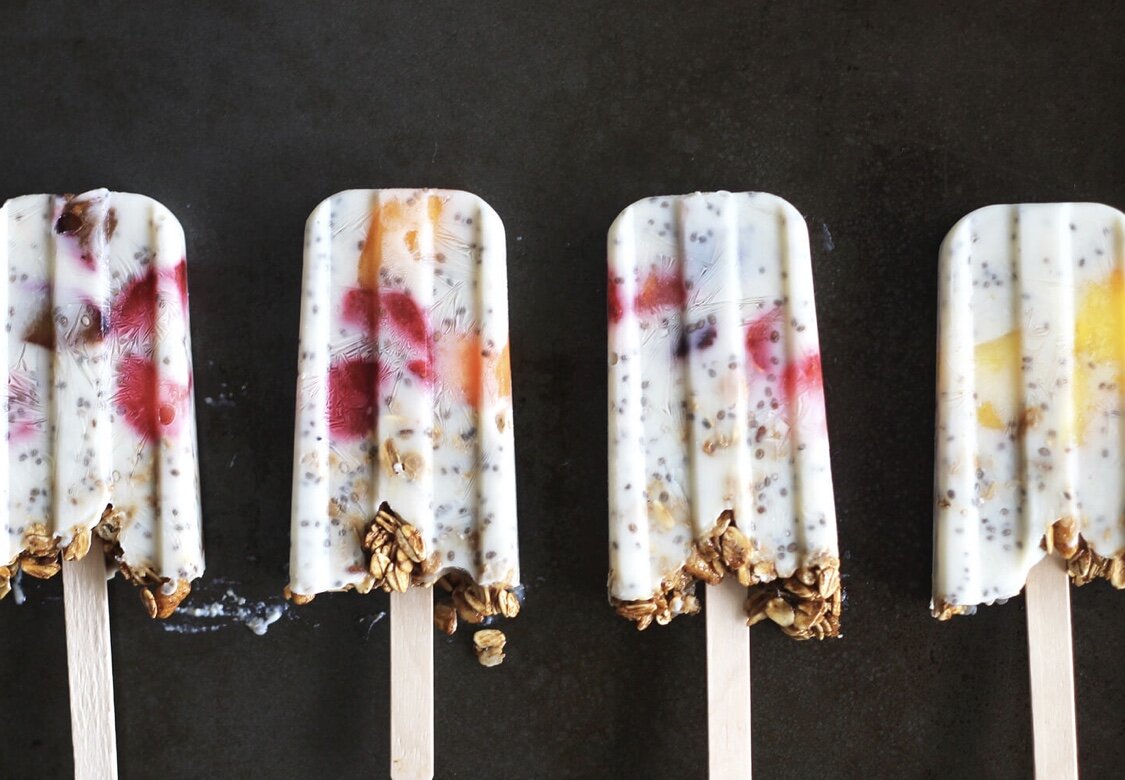
Chia Seed Breakfast Popsicles


Ingredients: 


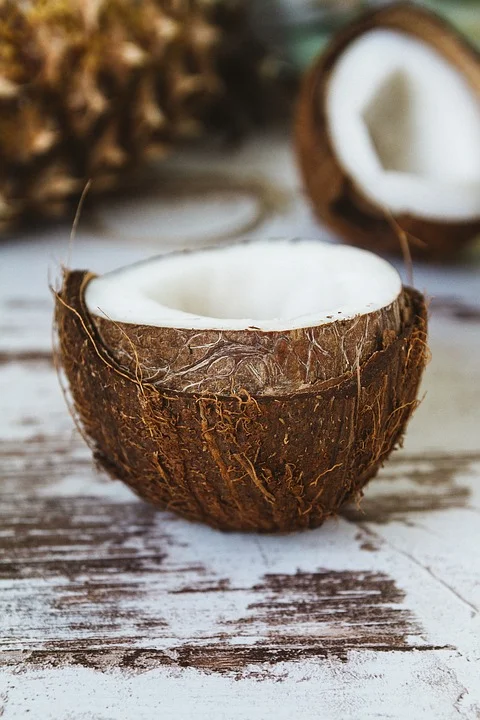
  • 1 cup Plain Yogurt (coconut, Greek... whatever you'd like)

  • 1/2 cup Unsweetened Almond Milk

  • 2 tbsps Raw Honey

  • 1 tbsp Chia Seeds

  • 1/3 cup Strawberries (sliced into small pieces)

  • 1 Peach (sliced into small pieces)

  • 1/3 cup Pineapple (sliced into small pieces)

  • 1/2 cup Granola (buy, make... your call)


    Directions:


  1. In a medium sized mixing bowl, combine the yogurt, almond milk, honey, and chia seeds. Mix well.

  2. Fill popsicle moulds about 1/4 of the way with the yogurt mixture then drop in the fruit. Spoon more of the yogurt mixture in to cover the fruit. To burst any air-pockets in your popsicles, press down on the mixture with a spoon.

  3. Sprinkle the granola into the moulds to cover the yogurt and fruit, and press down with a spoon so that it gets incorporated with the yogurt mixture.

  4. Freeze for at least 5 hours. When you're ready to eat, leave on the counter for 10 minutes before removing from moulds, so they will slide out effortlessly. Enjoy!


XO,
Tara

Can I help you create an exercise HABIT?!

Remember when you said you'd workout more often?


Maybe it was December 31, 2018 when you made that proclamation. Maybe it's been on your to do list for a decade? Or maybe, maybe you've recently decided that exercise (or ANYthing else) needs to be a part of your life in a more meaningful way.

We talk a lot about habits here at Tara Allen Health. My clients know alllll about habits as we work on breaking up with old ones and implementing new ones to create the health, body and lifestyle that aligns with their dreams.

Where are my DIYers out there? Today I want to get really tactical with you on how to start this process for yourself. There are 4 parts of a habit, and therefore, 4 steps to creating a new habit that will actually (seriously) stick.

And THAT, you guys, gets me very excited.

First, check out this video from last week all about the 4-step process. It has all the tangible advice you need to know to get started on creating whatever new habit you'd like in your life.

Then - for extra credit ;-) - check out THIS video that I posted inside my private facebook group as a follow-up. It will teach you why you can't seem to stick to a "diet" or plan even when you *know* what you should be doing. Better yet, it teaches you exactly how to work WITH the way your brain is wired so you can make progress and reach your goals. YES, YOU! It's about freakin' time, isn't it?

Side note: I mention my upcoming healthified holiday dessert cookbook coming in early November (so soon!) in the beginning of that video. I am SOOOOO excited to put this thing out in the world after dreaming about it for YEARS and working on it for just as long. Hard work usually happens when no one's looking. It happens when no one's there to give you credit. The results of your hard work usually come along much further down the road. Does this sound at all like what we talk about with our health + body transformation goals?! ;-)

I will keep you posted very soon!


XO,
Tara

image1 (3).jpeg

Monkey Salad

image1 (1).jpeg

Have you ever heard of Monkey Salad before? It’s a cute name for a fun fruit-and-nut salad that contains bananas.


We just saw the Curious George movie recently, so I have bananas on my mind. :-)


This makes a great snack or dessert when your sweet tooth is strong. Kids really love it too! The best part is that you can customize it to suit whatever you have on hand or individual allergies.


Swap out the nuts, change the fruits, experiment with different nut or seed butters … it’s all good (and delicious!).


Monkey Salad


1 banana, sliced
½ cup of berries or sliced apple
¼ cup cashews, pecans, walnuts or almonds
1 tbsp almond or other nut butter
(optional) 2 tbsp coconut flakes
(optional) Sprinkling of sea salt
(optional) Drizzle of honey


Put all of the ingredients in a bowl and enjoy!


In good health,
Tara


P.S. I have just a few spots left to test out a NEW online weight loss program I created. This is a chance to get your healthy weight loss transformation for a lot less money! If you believe that diets aren't the answer, that healthy change involves nutrition, moderation, real life, fitness, lifestyle upgrades, and a new way of thinking (to match the sweet, smart warrior you are), then you're going to LOVE this opportunity!


If you are ready to prioritize your health with 15-20 minutes a day and $97 a month (for EVERYthing - nutrition, fitness, lifestyle habit upgrades, and mindset rewiring), reply to this email and let me know. I'll share more details and we can hop on a call to chat about it along with your goals.


This opportunity is just for a few more ladies willing to take a leap! I will then be closing enrollment for a while as I work with this current group.


If you were looking for a sign, this is it. Email me now. ;-)

Choco-Banana Berry Smoothie Bowl

Are you ready for a new summer dessert staple?! Smoothie bowls are what my kids refer to as "ice cream"…seriously! And this one I'm sharing today happens to be a favorite around here in the Allen household.


The trick is to use plenty of frozen produce and adjust the liquid as you go to get the right consistency. Get creative with toppings! Berries, coconut flakes, dark chocolate chips, nuts and seeds all work well. 


Yes, it contains cauliflower, and yes, it’s yummy. 

image1 (1).jpeg


Choco-Banana Berry Smoothie Bowl 

Makes 2 servings 


Ingredients: 


1 frozen banana, sliced 
1 cup frozen cauliflower 
1 cup frozen berries of your choice 
⅓ cup canned coconut milk (shake it up first!) 
⅓ cup coconut water as needed (or regular water) 
¼ cup raw cacao powder 
1 tbsp nut butter of your choice 
Pinch of Himalayan sea salt (optional) 


Directions: 


1. Pour a little bit of the water in the bottom of your high-speed blender, then add banana, cauliflower, berries, coconut milk, cacao powder, nut butter, and salt in the blender. Add the rest of the water. 

2. Blend until smooth, scraping the sides as needed. This will be thick. Add more water if necessary. 

3. Place in two bowls and eat immediately with a big smile on your face. 


Talk soon,
Tara

P.S. Are you on instagram? Me too! I'm @tara_allen_health over there. I'd love to hang out with you in between our weekly emails. 

Dark Chocolate Love Bites

IMG_1770.jpg

It’s Valentine’s Day week and it’s not too late to make something that requires minimal time + ingredients but looks super fancy…and tastes even better! ;-)

DARK CHOCOLATE LOVE BITES

Ingredients:

  • 3.5 oz. dark, organic chocolate

  • 1/4 cup pomegranate seeds

  • 1/4 cup slivered almond

Directions:

  1. Fill one large pot with water and place a smaller pot inside. Bring to a boil then reduce to simmer. Make sure no water can get into smaller pot.

  2. Add dark chocolate to smaller pot and stir continuously until melted. It burns fast…don’t take your eyes off of it to help with your daughter’s math homework.

  3. Spread a large piece of wax paper across your counter. Place a heaping teaspoon of melted chocolate onto the wax paper so it forms a circle. Repeat until all chocolate is used up.

  4. Immediately place 4-5 pomegranate seeds in the center of each chocolate and then surround with slivered almonds.

  5. Let chocolate cool for 1 hour before peeling off the wax paper. Arrange on a nice plate or place in mason jar.

    Make sure you tag me on social when you share these beauties! ;-) Enjoy!

    In good health,

    Tara

Coconut Macaroons

It’s the week before Christmas and the New Years celebrations are kicking off in 2 weeks. Some of us are all cookie-baked out. Is this you?! Do you need something different? This macaroon recipe has just 4 ingredients! You must try. :-)

51.jpg


Coconut Macaroons

Ingredients:

·      2 large egg whites

·      ¼ cup honey

·      ¼ teaspoon sea salt

·      2½ cups unsweetened coconut flakes


Directions:

1. Whisk egg whites to stiff peaks with a hand blender.

2. Gently whisk in honey and salt.  Fold in coconut flakes.

3. Place bowl in fridge to chill for 30 minutes.

4. When ready to bake, Preheat oven to 350 degrees F.

5. Fill a melon baller with batter (firmly packed)

6. Release batter onto a parchment paper lined baking sheet, and bake for 10-12 minutes, or until macaroons are golden brown.

7.  Cool for at least an hour.  Serve and enjoy!

In good health and holiday cheer,

Tara

IMG_0703.jpg

Chocolate-covered Watermelon Treats

watermelon.jpg

Make these for your next Summer party!

  1. Watermelon slices.
  2. Top with homemade chocolate (melted coconut oil, cacao powder, and maple syrup OR honey.  See this post for the chocolate tutorial video I made with my kids).
  3. Sprinkle coconut flakes on top (or coarse sea salt!).
  4. Keep in a single layer on a wax paper-covered tray in your fridge or freezer.
  5. Pretend it took you longer than 5 minutes to make because they are SO pretty!

Will you be adding this to your Summer recipe round-up?  Let me know in the comments!

In good health,

Tara

P.S. Did you know that I share recipes like this one at least weekly inside my private facebook group, Lean In with Tara Allen Health?  All recipes are dairy free, gluten free, and vegetarian.  We also participate in weekly challenges together and I share workouts.  Consider it your one-stop health / weight loss / fitness / nutrition stop.  :-)  Come join us!

Zucchini Muffins

Hello there,

Are we connected on facebook or instagram yet?  If so, you might've seen a recent post in which I shared how much I LOVE the fact that muffins freeze well.  This is our go-to dessert that we bring with us when we want the kids to partake in a dessert that their little bodies will be happy about.  I often make huge batches and freeze them.  They'll last a few months in the freezer, but ours never make it that long.  ;-)

I often make different types of muffins depending on what we have on hand or what the kids are asking for.  But, these zucchini muffins have been a HUGE winner amongst all members of our family for quite some time.

I've shared this recipe in my newsletter before, but since some of you are new to this blog and my newsletter, I figured it was time to share it again (plus, I was asked to)!  

If you would like to receive my future newsletters with more healthy recipes, workouts, weight loss and health tips, sign up here and grab your free gift all about Debunking Calorie Counting (there IS a better way...I promise!).  :-)

And, if you really want to be in the loop, consider joining my private facebook group, Lean In with Tara Allen Health, as well.  It is a community of like-minded ladies looking to upgrade their health choices on a daily basis.  Every week comes with a new challenge to participate in, a healthified recipe, full-body workouts, and video trainings on weight loss and wellness topics.  Come hang out with us!

Ok...on to the recipe!  This one is gluten-free, dairy-free, soy-free, and has no refined sugar.

***Please note, this recipe makes 10-12 muffins due to variables like the freshness (and juiciness) of the zucchinis and the size of the bananas.

zucchini.JPG

Zucchini Muffins

(Makes 10-12 muffins)

Ingredients:

Wet:

  • 3 eggs
  • 1 large banana, ripe
  • 1 cup unpeeled zucchini, shredded 
  • 1/4 cup honey

Dry:

  • 1.5 cups almond flour
  • 2 tsp cinnamon
  • 1 tsp baking soda
  • 1/2 tsp nutmeg
  • 1/2 tsp sea salt

Directions:

  1. Preheat oven to 350 degrees F.
  2. Combine dry ingredients in a large bowl.
  3. Blend wet ingredients together in a blender.
  4. Pour wet ingredients into bowl with dry and mix well.
  5. Fill muffin liners 2/3 full in muffin pan.
  6. Bake 20 minutes (or until toothpick inserted in the center comes out clean)

Hope your family enjoys these as much as my family does!

In good health,

Tara

Almond Coconut Bliss Balls

Hellooooooooooooooo!

It's December 3rd.  Yup.  Go check, I'll wait.

:-)

Well, sometimes you need a break from the fancy-schmancy cookies and pies that turn your kitchen upside down and your floors into a flour skating rink.

I feel ya.

Try these Almond Coconut Bliss Balls!

These are a delicious snack or dessert and require NO BAKING!  They come together quickly, so they work wonders when you're in a pinch and need to bring something sweet to your office potluck, your next holiday party, or just to have something on hand for out-of-towners.

<<<These are gluten-free, dairy-free, egg-free, soy-free, grain-free, no refined sugar, vegan>>>

Enjoy!

In good health,

Tara

AlmondCoconutBliss.jpg

Almond Coconut Bliss Balls


Ingredients:

1 cup coconut flakes (unsweetened)

½ cup almond flour

2 T honey

2T coconut oil

1 tsp pure almond extract

½ tsp cinnamon


Directions:

1.    Mix all ingredients together in a large bowl.

2.    Refrigerate for 30 minutes to harden.

3.    Roll into balls (approximately 1 T each).

4.    Place in freezer on a wax paper covered plate for at least 1 hour.

5.    Keep in container in freezer or refrigerator and serve cold (will melt if left out too long).

THE Chocolate Chip Cookie

Hey all,

How was your Thanksgiving?  We had a great time making memories, eating food, seeing family...ya know, checking all the boxes.  ;-)

Truth be told, Thanksgiving is probably my favorite holiday.  I don't eat turkey or go to the parade. I can't even have most of the desserts anymore with my food sensitivities.  BUT, a holiday that we've turned into counting our blessings that also gives us a 4-day weekend together and marks the beginning of the Christmas / New Year's festivities?  Now that's what I'm talking about!

If you follow me on Facebook or Instagram, then I hope you saw my post yesterday where I thanked YOU for being in my life.  The support, comments, emojis, questions, and presence I feel and get from you is what makes everything I do so much fun.  If I know you are making and enjoying the recipes I create, I will keep 'em coming!  When I hear that my workouts helped you get healthy, lean, & strong, they'll be more where those came from.  Every message and email where you allow me to step into your world for a moment by sharing something about your health journey is a blessing.  And for that, I'm thankful.

Enough of the sentimental stuff, right?!  You want this recipe!

The chocolate chip cookie is such a staple this time of year during parties, gatherings, and cookie exchanges.  Heck, even Santa stops to nibble as he's stuffing presents under the tree and navigating our chimneys and all.  

This year I set out to create the perfect chocolate chip cookie for my family (and maybe yours?).  It needed to be gluten and dairy free.  No refined sugar.  And, as we came to find out, no coconut oil if I wanted my husband to like them too (and I did!).

So, after countless attempts and notes and crumb-filled counters, I think I nailed it!  Based on the speed at which these disappear, even amongst those that swear they don't eat anything 'healthy', I'd say they pass the test.  

I hope you and your family agree.

Do you plan to make these?  Please let me know!  Share a picture on Facebook or Instagram and tag me!  It would make my day.  :-)

In health and holiday cheer,

Tara

ChocolateChipCookies.JPG

THE Chocolate Chip Cookie

Makes 36 cookies (plus an extra nibble of the raw cookie dough)

Ingredients:

Dry:

4 cups almond flour

1-cup chocolate chips (choose carefully… or make your own)

1 tsp. baking soda

½ tsp. sea salt

¼ tsp. ginger

Wet:

½ cup avocado oil

1/3-cup maple syrup

4 tsp. vanilla


Directions:

1.    Preheat oven to 350 degrees F.

2.    In a large bowl, mix dry ingredients together.

3.    Add wet ingredients to dry and mix until well combined.

4.    Place tablespoon-sized balls onto a baking sheet lined with parchment paper.

5.    Use hands to flatten balls to make cookie shape (these cookies will not change shape much at all when baking).

6.    Bake for 12 minutes (edges should look golden-brown).


***These are gluten free, dairy free, egg free, vegan, grain free, and contain no refined sugar!

Watermelon "Cookies"

I've been on a watermelon kick lately, because…Summer.  Our latest creation involved the baby, the toddler, some fun cookie cutters, and MOST DEFINITELY a couple of baths afterwards.  ;-)

Check it out:

Puffed Rice Treats

Puffed Rice Treats

Puffed Rice Treats

We set out on a mission to create something new for this weekend.  With out-of-state friends coming for a visit (and one with a peanut and tree nut allergy), we decided to venture away from our usual desserts which often have nut flour or nut butter in the mix somewhere.

After seeing the packaged version of this dessert on the store shelves, I decided I would try my hand at my own version.  Puffed brown rice with no other ingredients could work as the base and sunflower seed butter would help add flavor.  Honey seemed like the perfect option to sweeten and hold it all together.

My first trial-run came out great.  So, obviously, I switched it up the real deal.  (why?!?!)  Actually, I tried to cut corners and didn't freeze them long enough before cutting and they ended up being very crumbly - but still delicious!

These are a bit sweet for me, so I plan to make them again with a lot less honey as a better (and healthier) snack option.  They may get a bit crumbly again without as much honey sticking it all together, but I don't mind the granola consistency.

***Note: Make sure to get sunflower seed butter that's not made on shared equipment in a warehouse that also makes nut butters if you're cooking for someone with food allergies.  I'm sure you all know that already!  :-/  Luckily we looked over the package together first. Although they seemed to be a hit with most, our friend with the allergy was not able to try these.  What a silly mistake!  Ugh.  Live and learn.  ;-)

Puffed Rice Treats all mixed and ready to be compacted down a bit more and frozen for a little before cutting into squares.

Puffed Rice Treats all mixed and ready to be compacted down a bit more and frozen for a little before cutting into squares.

Puffed Rice Treats

(gluten-free, nut-free, dairy-free)


Serves 16


Ingredients:


4 cups puffed brown rice

½ cup sunflower seed butter

½ cup raw honey


Directions:


1.    Pour puffed rice into a large mixing bowl.

2.    In a saucepan on the stove, bring sunflower seed butter and honey to a rolling boil.  Remove from heat.

3.    Pour sunflower seed/honey into bowl with puffed rice and stir well to combine.

4.    Spoon mixture into a pan (8x8 cake pan works well) on top of parchment paper.

5.    Using a spatula (or spoon), press down hard to compact mixture.

6.    Place in the freezer for 30-60 minutes.

7.    Remove and cut into 16 squares.  J


Do you plan on making these?  They come together in about 5 minutes.  Then just freeze for a bit and cut up into squares and you look like you've been working hard all day in the kitchen!

Let me know how yours come out.


In good health,

Tara